Off Road Truck Tires Driving Techniques And Safety

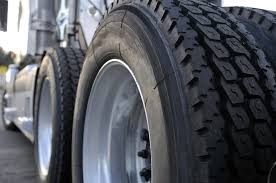
Fleet Truck Tire Maintenance Tips You Cannot Afford To Ignore

Let’s face it. Fleet truck drivers, on the whole, are not terribly concerned with the proper maintenance of truck tires that are taking them from Point A to Point B. Especially now, with mandatory electronic logs that are keeping them accountable when on duty, they’re less likely than ever to lose driving time to perform an “unpaid” task on their own, like ensuring their tires are functioning safely and optimally at all times.

For example, drivers are often re-inflating tires that have run 20% or more in an under-inflated condition. And this is a problem, even with those drivers that do check inflation pressure regularly, because they may not be aware of the potential dangers of personal injuries or blowouts on the road when a tire in low-pressure condition is simply topped up and considered to be road-worthy again.

Commercial/Vocational truck safety is a constant concern with fleet owners, and being vigilant about tire safety is a primary concern that both drivers and their supervisors should be making a priority. Below, we have listed 6 tips that will keep tire performance high, extend tire life, and keep vehicles and drivers safe on the road:

# 1: ALWAYS BE ON `GATOR’ ALERT

Gators are pieces of tire left on the road when a retread tire shreds. The textured lengths of broken-off rubber, with ridges and scales, look like the back of alligators, and hence their name. Road Gators are most often encountered on interstates where the speed limit is 70 mph-75 mph.

The reason Road Gators pose a danger to truck drivers is this: they can potentially rip steering components, damage oil pans or even smash through the windshield. Being watchful of them, especially during low-light conditions, is necessary when you’re driving cargo-laden or any other kind of vocational trucks for long hours at a stretch.

# 2: RECAP AS SOON AS THE TREADS ARE WORN

Treads are the part of the tire that maintains traction with the road, and any signs of wear and tear should be addressed as soon as possible. The Penny Test (inserting a penny into a groove on the tread, head pointing down, and knowing the tread is too worn when the top of Lincoln’s head become visible) is a good way to check on this.

Thick-bodied, quality tires can be retreaded to give them a new lease of life, and the process — called “recapping” – is a smart way to make expensive tires work longer for you.

# 3: AFTER EVERY 5,000 MILES, IT IS TIME TO ROTATE

Tires don’t wear out equally because vehicles aren’t perfectly balanced quadrilaterally. Rotation is the solution, because when you shuffle tires around, they are more likely to sustain a similar amount of wear and tear and finally need replacement at the same time.

The standard schedule for rotation is usually between 5,000 miles and 8,000 miles, but the manufacturer’s manual will give you the precise, recommended date. Maintaining a system where tires are rotated as per brand instructions for every truck in your fleet will pay off in the long run, because tires are a big financial investment.

# 4: “MIXING” TIRES IS NOT RECOMMENDED

Don’t mix tires on your fleet trucks. In other words, avoid pairing a normal tread depth with a deeper one, or a radial with a bias-ply tire.

# 5: PAY ATTENTION TO TIRE STORAGE

Tires can age pre-maturely if they are not stored in a cool, dry place that is sheltered from direct sunlight, and this can significantly reduce their working life. Washing tires regularly is another way to hold off pre-mature aging.

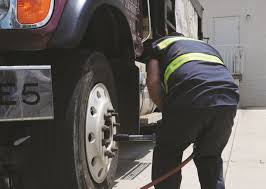
# 6: EVERY TRIP MERITS AN INSPECTION

Before a rig goes out, or after it comes in, it is important to inspect the tires for damages sustained from potholes, uneven road surfaces, glass shards, rocks and all kinds of other debris that litter the roadways. Drivers are not always aware that their tires have been compromised, especially during low-light hours, and they run the risk of a blow-out, costing the fleet company time and money, when a simple inspection at the end of a trip can easily locate and rectify these problems.

Tires for lifted trucks

Lifted trucks have the best off-road results when you pair them with the right tires. Higher trucks with bigger tires allow you to ride harder, faster and better over mud, rocks, sand or snow. When you lift a truck, you also need to buy tires that support your vehicle’s new height and size.

When shopping for tires that support your chosen lift kit option, it’s best to evaluate what you want out of your vehicle — for both style and performance! Determining the type of tire needed to accommodate your driving lifestyle will inform the clearance room required for your wheels which ultimately decides the height of the lift installed on your truck or SUV.

A stronger, wider, larger tire is always your best option, no matter if you choose to install a leveling kit, body lift kit or a suspension lift kit. Most lift kit manufacturers provide suggested tire sizes for each of their kits. It is also very helpful to visit internet forum pages to gauge the experience and advice of other vehicle owners who have lifted their truck or SUV. Depending on your vehicle’s make/model and size of the lift, you can fit anywhere from 33-inch tires, 35-inch tires or even 37-inch tires.

How Lifting Your Truck Changes Tire Wear Patterns

When you lift a truck, you generally add bigger tires, which are heavier and wear down more quickly when driven on asphalt. Most tires for lifted trucks are for off-roading, which means they have aggressive treads that wear down quickly on hard surfaces. Ideally, having two sets of tires—one for off-roading and one for everyday driving—would be the best option, but that involves buying and storing two full sets of wheels. It’s also in super inconvenient if you don’t have your own tools to switch between sets when you need to. A more wallet-friendly option to cut down on tire wear is to switch out your steel or alloy rims for a set of forged one-piece wheels. They are lighter and stronger, but are still pretty expensive, so they aren’t for everyone.

Truck tire replacement frequency

Every truck is different. This means that, unlike passenger cars, there’s no solid guide that lists the recommended tire replacement intervals for all semi trucks or work trucks. In Florida, a driver can usually expect to get up to 100,000 miles from a semi truck tire set. Without a standardized guide, though, the most important thing you can do is stay up to date with truck and tire maintenance.

TIRE MAINTENANCE TIPS

Here are a few ways you can keep your truck’s tires in good condition for longer:

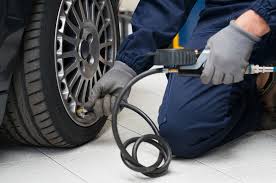
  • Check for Proper Inflation: After you’ve given the tires time to cool, check the tire pressure. To check for the correct PSI, weigh the truck fully loaded. Make sure you weigh the front, rear, and trailer axles separately. You can find the right PSI by comparing the axle weights to those listed in the tire manufacturer’s book. Pay special attention to the load supported by the front axle. If the scale weight exceeds the maximum load-carrying capacity, you’ll need to upgrade to higher capacity tires.
  • Keep Tabs on Tire Wear: Tire wear is caused by friction. To make sure your truck’s tires are wearing evenly, you’ll need to keep up with tire alignments and pay close attention to inflation and load-carrying capacities. Putting tire service off will have consequences — the severity of which depends on the length of time tire maintenance is ignored.
  • Inspect Your Tires Regularly: Your truck components, especially the tires, require routine inspections. Mainly, you’ll want to check for signs of wear and tear and proper inflation. If your truck’s tires are 20% below their recommended PSI, they’re technically flat tires and should be replaced immediately. You’ll also want to double-check the condition of the valve caps, tire

How to choose the right truck tires

Here are two points to keep in mind while you’re shopping for tires:

  • Load Capacity: If you drive a larger truck, such as an HV Series or MV Series, your tires will be under a serious amount of strain. For this reason, it’s important to choose tires that can handle high load capacities and demanding conditions. This is crucial to job performance, as well as safety. Before you buy a tire, check its load index. This information is written out as a numerical code that states the load capacity of that tire at the speed indicated by its speed symbol.
  • Off-Road Driving: Different types of driving require different types of tires. For example, commercial tires designed for travel through Miami don’t have tread strong enough to traverse rough surfaces like rock or gravel on a daily basis. Even if your job only takes you off paved roads occasionally, opt for tires that are 80% on-road and 20% off-road.

LT Tires for Heavy Loads, Towing and Off-Road Durability

LT tires are going to be more expensive than p-metric tires. This is because LT tires have extra material in the sidewall and under the tread that protects the tire from damage. The cords in a LT tire are a larger gauge than P-metric tires so the tire can carry heavier loads.  Very often LT tires will have an extra steel belt, a deeper tread and thicker rubber in the sidewall for more protection vs a p-metric tire. LT tires are usually 8-ply (Load Range D) or 10-ply (Load Range E). Passenger Tires usually have a 4-ply or 6-ply equivalent sidewall.  The performance trade-off of this added weight is a harsher ride, less fuel efficiency, and less responsive handling.

Tread-wear or tire mileage is typically about the same for LT and P-metric tires, except if used often on gravel roads. If used on gravel roads, you should consider an LT tire instead of p-metric because the tread rubber in LT tires is usually especially formulated to resist chipping from stones. On paved highways,  p-metric tires typically have better wet and dry traction on pavement.

If you drive your truck heavily loaded or pull heavy trailer loads frequently, you should consider replacing your p-metric tire with an LT tire. Tradespeople that have their truck or van loaded with tools, supplies and equipment often find that the stiffer LT tires provides less sway, and therefore more confidence inspiring handling as well. Others may find that the ride is slightly harsher and not as comfortable. This is one of the trade-offs you can expect when you replace a p-metric tire with a LT tire.

Practical Home Renovation That Significantly Increase Your Home Value

How to update older homes with modern home renovations?

One of the biggest changes you can make to your home during a renovation is to add an extra room. Home additions require the help of professional designers and contractors. You can’t just add a new room to your existing house without first doing a lot of researching and planning. Keep in mind that the existing electrical and plumbing systems must be considered. You will also be expected to check with zoning laws to make sure that requirements are met with your design.

Here are some of the things to consider when it comes to home additions:

First things first, decide which direction you want to go: out or up. Building out may require foundation work and related expenses. Building up may require some demolition costs. Also, what kind of room do you want to add? An extra bedroom? Extra storage? More attic space? An additional bathroom? Consider your needs carefully.

Once you’ve outlined a plan, talk to an architect from a company such as The Pros, and have the plans drawn up. This is also the time for you to gather any legal documents you may be need. Obtain an accurate plot plan that that shows property lines and the proximity of the proposed addition to the existing buildings.

Select the ideal materials for the project. The ideal material will be whatever matches the existing structure. If you have a wood home, have your renovator determine the exact species of wood. However, matching roofing materials may be more difficult to find. If the existing structure is showing too many signs of age anyway, you could consider having a lot of it redone.

Understand common home addition problems, such as putting stress on the foundation and floor framing problems for upper-level additions. For the first problem, it may be necessary to remove old footings and build a proper foundation. The second problem may be fixed by “sistering” additional joists onto the existing joists to provide extra support to the system prior to the subfloor being put down.

If you have an older home, have it inspected for hazardous materials or substances that may require special handling. Examples include lead paint that was used in the early ‘70s or dangerous fibers used in construction products from the 40s through 60s. It’s best to have a professional get rid of these materials before you begin the extension.

Building a home addition may require a more extensive heating and cooling system. Options include extending the existing system, upgrading the entire system, or installing a stand-alone system that is designed to service the new room(s).

Plan your budget. There is a misconception that this type of renovation project comes with many hidden costs. However, most of the expenses are in plain sight. You can plan a realistic budget ahead of time. Some of the expenses will include contract fees, materials, finance charges/loan interest, increased premiums, higher property taxes, landscape repair, architectural fees, etc. It’s still a good idea however to have some extra money just in case there are any building problems.

Tips for Preparing for a Home Remodelling Project

If you know what to expect with a home remodelling project, you’ll know how to prepare properly. It’s ideal to hire licensed renovators to handle the complex work. A remodelling project will likely disrupt your everyday life on some level. Proper preparation will minimize the disturbance and make the whole project easier on both you and your renovators. Even if you are feeling stressed just know that after the project is completed, the benefits will outweigh the inconveniences.

Here are some tips for preparing for home remodelling:

Do research and familiarize yourself with the tasks that are involved in the project. Even if you are hiring somebody else to do the tasks, you should still watch how-to videos. Take note of what kind of tools and supplies will be used. Read safety tips as well. When preparing for any project that requires any type of clean-up, keep a damp towel and paper towels readily available.

If you are planning remodelling a bedroom, you might need to prepare another place to sleep. For highly complex projects, consult with renovators to find out if your house will be livable, or if you and your family should find another place to stay until the project is completed.

For projects involving solvents, paints, or products that are known to produce harmful fumes, make sure the workspace has proper ventilation. Also, thoroughly clean the workplace beforehand. Take care of dusting and vacuuming so that dust and dirt won’t be stirred during the task. Running an air filtering system can be helpful as well.

Prepare a safe place for pets and children. Keep them as far away from the workplace as possible, and make sure they can’t wander into the area.

When it comes to kitchen remodelling, you might want to create a temporary kitchen somewhere else in the home with a mini-refrigerator, ideally near a water source. Keep the dishes in another sink or use disposable dishes and utensils. Find a place to keep the essentials, such as napkins, condiments, cloths, garbage bags, dishwater soaps, etc.

It’s essential that you and the renovation team maintain an open line of communication. Everybody should be on the same page at all times in order for the project to be a success. Know what they expect of you and vice versa.

There is always the possibility of unexpected expenses. Even if you have everything planned out perfectly, there still might be some cash concerns. Increasing costs cause anxiety. You can reduce the stress involved by having extra money on hand. Have 10% – 20% more than the estimated budget.

Establish traffic areas. There will be a lot of foot traffic both out and in your home. Workers will be walking around with tools and materials. Work with the renovation team to come up with a traffic plan and protect the flooring along that area with plastic covering. Also, keep any area(s) the workers may need access to, such as the basement and bathroom, cleared of clutter.

Home renovation guides

Whether you’re gearing up for a DIY home renovation project or calling in the pros, here you’ll find a range of expertly written guides that list out the money must dos and don’ts when renovating or looking for a renovation loan, including how to add value without overcapitalising on your property.

The best way to fund your home renovation

Relaxing on your lounge sipping a glass of red you start thinking it’s about time we tear out that 1950’s kitchen and renovate, building a modern, more usable kitchen. Or maybe you start daydreaming about how a fresh coat of paint will brighten your living area. Regardless of how big or small your home renovation project may be you still need to find the funds to make it happen

As we all know, nothing’s for free! Good news though, there are plenty of options to finance your home renovation. The best way, will depend on your individual circumstances and financial situation. So sit back and continue to enjoy that wine while you learn about the top ways to fund your home renovation.

Use a Stash of Cash

If you’ve been disciplined with your savings over the years then you may be lucky enough to have a stash of cash piled up to pay for your renovations. Cash is always your best option, as you avoid paying interest and amassing more debt. However renovations aren’t cheap, with a complete bathroom makeover costing up to $20,000 it’s going to take years and years to save up enough dosh to turn your dream into reality. So realistically, if you have cash, it will likely cover smaller projects like a new paint job or fitting a flyscreen door.

Sign up for a Low Interest Credit Card

Given the many negative connotations with those pieces of plastic you keep in your wallet, you may not believe what you’re about to read! However, we are happy to advise that a low interest credit card is an option to consider to fund any small home renovation. So we’re talking about minor changes around the home and inexpensive DIY projects. These cards generally have interest rates of 14% p.a. or less with most providers offering up to 55 days interest free.

Quick weekend renos to add value to your home

You’ve read the weekend paper, gone for a lovely stroll and had your Sunday coffee, now you’re twiddling your thumbs looking for something to do. Look no more, we’ve got the solution, pick up a hammer or paintbrush and get to work on a quick and easy renovation task that will add value to your home. Given there’s no shortage of ideas when it comes to DIY home renos, find some time over the weekend, don’t lounge around and pick up a tool and get cracking.

Replace the front door and don’t forget the doorknob!

The front door to your home has a huge impact on the curb appeal of your place. It can be the first thing potential owners look at, so you want it in good shape. If it looks old and shabby it can turn people away for good. All you need are some basic tools and you can replace a worn and torn front door on a Saturday afternoon and always remember to update the handle too.

Paint the front door

If you don’t have the tools or feel like you may not have the skills to replace the front door then give it a fresh lick of paint! It is the primary feature that buyers will see when they approach your place. A fresh coat of paint will add value to your home as well as leaving a lasting impression for guests and if your selling, potential buyers. When choosing a colour, go with one that compliments the colour scheme of your place. Don’t select a tone that is way out there, as that can turn people off.

Paint the walls

While you’ve got the paintbrush out you may as well head inside. Painting the interior walls is an easy project to tackle over the weekend and is one of the simplest, most cost-effective improvements you can make to a home. If the walls are showing signs of wear and the colour is dated a lick of paint can improve the feel, cleanliness and look of a home quickly. When selecting paint colours, keep in mind that neutrals appeal to the greatest number of people, therefore making your home more desirable.

Update or add a kitchen splashback

The kitchen is a key selling point in any home so if it’s looking a little tatty, why not add value to it this weekend? A great place to start is by adding or updating the splashback, the most visible feature of a kitchen. You don’t need to go with an over the top, expensive kitchen revamp. Just by updating the splashback with stylish tiles you can brighten and modernise the space.

Tips to renovating without breaking the bank

Visualise your plan

Shut your eyes and visualise your renovation project. Then, if you’re handy with a pencil, sketch it on a piece of paper. It may seem a little silly but this is how the pros operate. Drawing up a mind map is a great way to present your ideas to the renovation professionals. This big picture will also guide you through the renovation process, keep you on track and prevent you from spending unnecessarily. A solid plan also helps deter renovation surprises that can pop up along the way, resulting in additional costs that could break the bank.

Set a realistic budget

Before you start turning your renovation dream into reality you need to have a set dollar number in mind to work with. Better known as ‘your budget’! A lot of people cringe when they hear this word but it’s crucial to set a realistic renovation budget if not you’ll end up breaking the bank!

When setting a budget don’t forget to factor in these three neglected expenses:

Rental property – If you’re undertaking a large scale renovation you may have to move out during the process, and renting a place isn’t cheap.

Eating out – Knocking out a kitchen and redesigning a new, modern, chic one is a common practice but don’t forget eating out adds up.

Storage – With extensive renovations you’ll need to store the contents of your home in a secure place, so don’t forget to factor this into your budget.

Add more $$$ to your budget

To really avoid breaking the bank build a 10% contingency into your budget to cover unexpected costs or overspending. You never know what can arise during the project so be prepared for surprises that will cost you money. For example, mould removal, asbestos removal or you may suddenly find you have to waterproof your house. Unexpected delays can also occur and consequently cost money such as; poor weather, sick tradies or a holdup in materials arriving.

Choose the best option to fund the renos

If you don’t have any cash stashed away to fund the renovations you’ll have to explore other options to finance the project. There is no right or wrong method to funding renovations, it’s about choosing the best method to suit your individual circumstances and financial situation so you don’t break the bank. Take the time to research the options out there and weigh up the pros and cons of each.

The Best Way To Unclog A Clogged Toilet

How to Unclog a Toilet Without a Plunger

It’s safe to assume that most homes have a plunger. Unfortunately, however, bad luck has a way of finding the rare times when you’re unprepared. There may come a time, no matter how unlikely, when you find yourself with a bad toilet clog and no plunger. Panic-inducing as this scenario sounds, it’s not insurmountable.

Hot water

When we say hot water, we mean hot–not boiling. Pouring boiling water into the toilet bowl could crack the ceramic, which would make an existing problem much worse. Use a bucket to pour about a dozen cups hot water into the toilet slowly. Let the hot water sit in the toilet bowl for several minutes. The heat from the water should break up the existing clog, allowing it to be properly flushed down the drain.

Copious amounts of dish soap

Another option is to take a bottle of dish soap and squeeze a large portion into the bowl. Let it sit for about thirty minutes. Before the time is up, you should see that water is starting to drain, but don’t freak out if it takes longer. How quickly the soap breaks down the clog depends on how severe the clog is. If you don’t have any dish soap, basic (don’t use a fancy, expensive salon brand) shampoo will work just as well.

Pouring some epsom salt into the bowl

This option could be especially helpful when you’re a guest in someone else’s home, and don’t want to leave the bathroom before you fix the clog. Snoop around the bathroom and look for a bag of epsom salt. Pouring epsom salt into a toilet bowl triggers a fizzy, soapy chemical reaction. This reaction can help break up the clog and clear the drain. If you can’t find epsom salt, a rogue bath bomb dropped in can help, too. Of course, then you’ll have to explain why you threw one of your host’s bath bombs in the toilet.

Using a toilet brush

Sometimes you won’t find a plunger, but you’ll almost always find a toilet cleaning brush. You could always use that to clean out the clog. This method is going to take some elbow grease, and, honestly, it might be gross, so prepare yourself. Hold the handle, push it into the drain hole, and pump back and forth several times. Don’t pump so forcefully that you damage the inside of the toilet. It happens more often than you think! After about thirty seconds, stop pumping. Then, you just have to cross your fingers and hope the water starts to drain.

Will a Toilet Unclog Itself? There are Main Factors

A clogged toilet will typically unclog itself over time. Most things that clog a toilet are water-soluble which means they will eventually dissolve in the toilet water. When the clog is given enough time to break down, the pressure of a flush should be enough to clear the pipes.

This might sound simple, but there’s a few more things you really should know before you let that poor clogged toilet fend for itself. Let’s get to it!

Will a Toilet Unclog Itself?

How To Unclog Your Toilet Without a Plunger

How to Keep your Toilet from Overflowing When Clogged

Related Questions

Will a Toilet Unclog Itself?

When deciding if letting your toilet unclog itself is a good option, there are two things to consider:

What caused the clog?

How big is the clog?

What Caused the Clog?

Letting the toilet unclog itself is only going to work if the object that caused the clog is an organic, degradable material. Basically, if you flushed something other than human waste or septic safe toilet paper, the toilet will not unclog itself.

How Big is the Clog?

The next thing you need to consider is how big or severe the clog is. If your toilet backs up some but then drains slowly, you have a partial clog. This type of clog is the easiest to clear and the most likely to unclog itself.

COMMON CAUSES OF CLOGGED TOILETS

When it comes to toilet clogs, the team here at Watters has seen it all. The stories we could tell you about things we’ve pulled out of people’s toilets are priceless — everything from keys to phones to toys. Just the other day we got a call from a panicked customer in Menasha dealing with a clogged toilet, which got us thinking about common causes of clogs and how to deal with them. While it may seem like common sense, we’ve seen many customers who accidentally clog their toilet, and then deal with clogs incorrectly, which inadvertently can lead to ongoing plumbing issues and expensive repairs. Take a few minutes to learn more about some of the common causes of clogged toilets and how you can fix the issues without causing lasting (and pricey) damage! 

Using too much toilet paper

This is probably the most common reason toilets get clogged — and oftentimes the easiest to deal with. If we’re honest, most of us are probably guilty of this one at least sometimes.

If you’re one of the many people who use a lot of toilet paper when you use the bathroom, here are a few tips…

Do a double flush. First, flush the waste, then follow up with a second flush for the toilet paper. This minimizes flushing too much at once.

Consider switching to a thicker and higher-quality toilet paper so you can use less.

Fold the paper rather than creating a ball. This makes it less likely for the toilet paper to get trapped in the drain.

Most of the time, a common toilet plunger should work to take care of these types of clogs.

If you’re trying to cut back on toilet paper to reduce clogs, bidets are another great option.

Putting non-flushable objects down the toilet

You should never flush anything other than toilet paper down your toilet. Period. It may not seem like a big deal as it flushes down, especially if it’s a “paper” product like Kleenex or wipes, but trust us when we say these foreign objects can build up, get trapped, and cause problems over time.

Items you shouldn’t flush down your toilet include:

Feminine products

Diapers

Baby wipes

Makeup wipes

Tissues

Paper towels

Cotton balls/Q-tips

Dental floss

Hair from your brush/razor

Food and beverage items

Cooking grease

How to Unclog Your Toilet

We’ve all been there. You go to flush, but instead of water going down, you see it rising up and up and up. . . . You panic: Did I really use that much toilet paper?

Toilet clogs are a pain to deal with anytime, but during the pandemic, they can really make you panic—you can’t afford to have a nonworking toilet, and you may be reluctant to have a plumber in your house. The good news: “Most clogs you can clear yourself,” says

Below, plumbers offer their advice on how to clear a toilet clog yourself and when you should call a professional. (As for what not to do, don’t use Drano or boiling water.)

We use simulated waste consisting of 160 solid polyethylene balls, seven sponges studded with No. 10 screws for realistic weight, and nonlubricated latex condoms filled with water. The best in our tests flush it all down in one go; the worst clog with the first flush

If you drop something in your toilet—say, a child’s toy—try extracting it first. Don’t force it down with a flush. Even if it carries down the pipes, it still has to move around 100 to 200 feet to get to the city’s sewer. “For a lot of people, once the object is out of sight, it’s out of mind,” says

How can I fix a clogged toilet without calling a plumber?

We’ve all been there: you’re using the toilets, flush the water, and it’s still there. Flush again, to no avail. It’s utterly clogged.

When at home I can simply call a plumber, but:

It costs money

It might happen outside your home, e.g. friend’s house

Use a toilet plunger. That’s what it was designed for, and if you use it right, won’t splash at all. Most people have one by the toilet, or in a small closet nearby. It’s far more effective than using a brush, and much less messy.

Just a note, I have 1 toilet in particular which a plunger is surprisingly ineffective. 🙁 The odd shape of the outlet doesn’t match up with the plunger well. It really sucks .. 🙁 I’m still trying different plungers to see if a better one fits properly .. however, not all plungers fit all toilets … just an FYI. 😉

Keep in mind when using this technique that after inserting the plunger, there is generally air in it. That air will compress, rendering the plunging stroke ineffective. This means you need to press on the plunger three or four times to get the air out. The first push with minimal air in the plunger typically is the one that clears the toilet

builder friend of mine who services student accommodation passed on this great tip that requires only a readily available and disposable tool – and no gloves:

get a garbage bag. Most homes will have one, often in the bathroom. Check it has no manufactured perforations

push one arm down to the bottom of the bag and hold the rim of the bag with the other

using the hand inside the bin bag, reach under water to the drain hole. You may feel wet at this point – you aren’t.

now pump the palm of your hand over the drain hole as a crude plunger OR simply use your fingers to remove the obstruction

once the blockage is dislodged or pulled out, the bowl should empty.

invert the bag by clenching your hand and pulling towards you while holding the opening in place over the bowl.

discard.

What Every Homeowner Should Know About Residential Roofing

How do you maintain a roof?

Every home has a roof. Without one, you will probably be in discomfort, either from rain or the sun. As the roof shields you from adverse weather conditions, you also need to maintain it too, as maintaining it will make it serve you for a long time.

Routine inspection and general maintenance can help in extending the lifespan of your roof. It will also save you the cost of a new roof installation.

The Problems Associated With Roofing

  • There are several problems associated with roofing and here are a few of such:
  • Poor or faulty installation: This is the main reason that causes the breakdown of a roof. If your roof was poorly installed, it is prone to future problems.
  • Leaks and moisture: This is another problem associated with roofs. The roof may begin to leak, emanating from factors like wind, excessive rainfall, and debris. Still, if your roof is properly installed, you will rarely have such issues.
  • Improper maintenance: The worst enemy of a roof is improper maintenance. Roof problems usually start small, and if not taken care of, escalate into more serious problems.
  • Lack of quality materials: Some unprofessional roofing contractors use bad-quality materials in the installation of roofs. This is the beginning of roof problems for homeowners.
  • How then do you avoid these problems? You avoid them by proper maintenance of your roof. How then do you maintain your roof?

Maintaining Your Roof

You can only maintain a roof that was properly installed. One that is not properly installed will eventually get bad. All roofs are prone to wear and tear, but the ones properly installed take a long time to get to that stage.

Here are the ways to maintain your roof:

  • Check out for damaged or missing shingles: This check should be done once in a while. You need to clean them, to keep them free from dirt, fungal and moss. If there’s any damaged or missing shingle, you only need to contact a professional roofing contractor.
  • Trim overhanging branches: You shouldn’t let a tree grow too close to your house. If there’s one already, you just need to ensure that the branches are not over-hanging. Trim often if they are. Leaves from these branches may fall onto your roof, causing the leaves to rot. The tiles of your roofing will also begin to rot.
  • Clear debris constantly: Check out for debris in the gutters and valleys of your roof, as they are prone to be congested by debris. If your gutters are clogged with debris, it leads to drainage issues. Stagnant water on your roof may make them weak, and leaking begins.
  • Check out for rust and corrosion: Rust and corrosion are roofing problems. They may be caused by excessive rainfall on your roof. If your roof starts to rust, also contact a professional roofing contractor.

General inspection and repair

Check the attic or other interior ceiling for stains that can indicate water is seeping into your home. Then examine the roof for missing, lifted or loose shingles and check the rest of the shingles for moss and mold, worn spots denoted by missing granules, cracks, peeling and curling. Additionally, check for missing or loose flashing, nails and metal roof bolts. Replace and repair shingles or flashing and replace or tighten roof hardware as needed.

Peeling, curling and partially lifted shingles found in more than one area of the roof can indicate that the roof is at the end of its usability. If you don’t have experience with roof replacement and you see this level of damage, hire a professional roofer to determine if the roof needs more than do-it-yourself maintenance.

Moss and mold removal

Gently spray a roof moss remover and cleaner on affected areas. Follow the specific cleaner’s instructions to wait for the solution to do its work and then gently brush away the moss and mold with a soft bristled broom and wide handheld brush. Use of a power washer or hard-bristled brush can wear away granules that protect the shingles from harmful UV rays.

Soffits, fascia, gutters and downspouts

Wearing heavy rubber work gloves, carefully remove by hand, or with a small scoop, all debris from the gutters and downspouts. Then, gently scrub away dirt and grime from all areas with a soft bristled cleaning brush.  Clear away remaining debris with a garden hose and then check for missing caulk and paint peeling, soffit and fascia rotting, holes and cracks, loose or missing gutter sections or hardware and gutter-related leaks. Make replacements and repairs and re-caulk and re-paint as needed. Keep in mind that leaning your body on the gutters while cleaning can damage them and potentially cause you to fall off your ladder. Installing gutter screens or covers can reduce yearly cleaning time.

Roof Maintenance Tips To Make Your Roof Last As Long As Possible

Whether your roof is brand-new or years old, here’s what you need to do to keep it in the best possible shape for the longest possible time.

A new roof is an expensive proposition — $18,800 on average for composition shingles, according to Remodeling magazine’s Cost Vs. Value Report, and as much as $36,000 for high-end materials. Once you’ve made that kind of investment, you’ll want to protect it.

And even if your roof is years old, maintaining it in good shape will prolong its life and keep you from having to replace it prematurely. Here’s what you need to do to get the most from your roof.

Clean the Gutters

Ruined paint on siding and a wet basement are typical problems caused by clogged gutters, but it might surprise you to learn that the overflow can also go upward. When leaves pile too deeply in gutters, water can wick into roof sheathing and rot it, or even rot roof rafters.

Fixing that kind of damage could run into the thousands of dollars, but you can avoid it by cleaning your gutters each fall and spring. Do it yourself in a few hours if you’re comfortable working on a ladder, or hire a pro for $50-$250, depending on house size.

Remove Leaves

If you have a simple peaked roof surrounded by low landscaping, your roof probably stays clear of leaves on its own. But if the roof is more complicated or if towering trees are nearby, piles of leaves probably collect in roof valleys or near chimneys. If you don’t remove them, they will trap moisture and gradually decompose, allowing moisture to accumulate in your roof — or worse, create fertile ground for weeds to grow.

If you have a low-slope roof and a one-story house, you may be able to pull the leaves down with a soft car-washing brush on a telescoping pole. Or you can use a specialty tool like a roof leaf rake, which costs about $20. A leaf blower gets the job done too, especially on dry leaves, but you or a pro needs to go up on the roof to use it.

If leaves are too wet or too deep, you might need to wash them off with a garden hose. Don’t use a pressure washer, which can force water up under the shingles.

Get Rid of Moss

In much of the country, composition roofs often become covered with black algae. Although unsightly, this filmy growth doesn’t hurt the roof. A little chlorine bleach or detergent mixed with water will kill it, but it’s safer for both you and the roof to just leave it alone.

If you live in the Northwest, you’re likely to find moss growing on your roof, particularly on wood or composition shingles. Moss, which looks more three-dimensional than algae, needs to go because it traps water. If you tackle it early enough, you can just sweep it off.

Roof cleaning

Roof cleaning is an effective way of maintaining your roof. It keeps the roof clean and free from debris that can cause a leak. Always keep the roof clean to avoid spending too much on roof repair.

Roof painting

Painting your roof can improve its appearance and protect it from weathering elements. It can also prolong the lifespan of the roof for up to 10 years. Familiarise or research the roofing products that are being used to avoid harmful effects and roof damage.

Roof restoration

Roof restoration involves cleaning, painting, replacement and removal of roofing parts and applying solutions to prolong the lifespan of the roof. Leaky and saggy roof, deterioration of materials and corrosion are common signs of a roof which needs restoration. Be informed about the services being provided by the roofer before agreeing to start the project to avoid miscommunication about prices and policies.

In conclusion

Roof cleaning, roof restoration, and roof painting are a few ways of maintaining your roof. It can prevent you from spending too much on renovation, keep the family safe, and avoid diseases. Work duration will depend on the type of roof damage and work that needs to be done. If you need roof repairs this information will help.

Commercial And Residential Painting

Old House Painting: Tips for Painting an Older Home

Older homes often have a charm or coziness that newer homes can’t replicate. Plus, they come with well-loved details like built-in shelving, original wood floors or quirky architectural details.

But every old home needs maintenance, updates or a refresh every few years or so. Paint is one of the best ways to give an old home new life while still retaining the integrity of the home. Painting an old home, however, is often accompanied by its own set of challenges which can range from small (tricky corners and trim) to large (replacing and repairing damaged walls or wood).

Whether you’ve just moved and are daunted by tackling paint projects that haven’t been touched in decades or have lived in your home for a while and need a color update, these next few tips will help make your older home painting project more manageable. Read on for best old house painting tips and ideas.

Know the Extent of Your Prep Work

You’re likely excited to pick a color and see your room come to life, but like all of our paint advice, we want you to always consider prep first. An older home usually requires a different approach to prep than a newer home.

Think through any areas that might need a deep clean or primed before painting. Ceiling painting in particular can be overlooked at this stage in the process. Older popcorn ceilings might need removed, smoothed, primed and painted. Or some ceilings may not have been cleaned in years, which means new paint may not adhere properly.

ESSENTIAL TOOLS AND EQUIPMENT YOU NEED FOR PAINTING

If you’re preparing for some painting and decorating jobs in the near future – as many people are at this time of year, homeowners and professionals alike – then your very first step will be to make sure that you’re properly prepared. There are few things worse than being midway through a painting job and suddenly realising you’re missing a vital piece of equipment, so to help you avoid that scenario, summed up all the absolutely essential painting and decorating tools and clothing you’ll need.

Tools and equipment:

Decorator’s overalls

Painter’s goggles

Dust masks

Gloves

Shoe covers

Detail:

PPE is a vital element of any job, and it’s no different when it comes to painting. You can never be too safe, and where your health or the health of those surrounding you is concerned, you should never take any risks. Equipment like goggles and dust masks protect the most sensitive areas of your face – dust masks especially can help prevent respiratory issues with inhalation. They may not be strictly necessary for every job, but we’d say it’s always better to be safe than sorry; if in doubt, we’d recommend wearing more PPE rather than less! Shoe covers might not always be quite as essential, but are they’re still useful if you need to protect furniture and carpets.

Tools and equipment:

Dust sheet, canvas sheet or similar type of sheet

Painter’s tape or masking tape

Decorating cloths

Detail:

Before you can properly begin any sort of painting job, you’ll need to make sure you’ve got the right tools at hand to be able to protect the room and the furniture. Obviously, your first course of action will be to remove as much as you can out of there anyway, but dust sheets or canvas sheets are essential to protect whatever’s left. From there, you’ll want to shield any door jambs and light fittings with painter’s tape or masking tape, so that they don’t get caught by any stray paint. Decorating cloths, meanwhile, are suitable for wiping and polishing any surfaces that you’re going to paint ahead of time, so that your finish isn’t ruined from any dust or debris clinging to the surfaces underneath.

The Right Way to Paint Your Apartment, According to a Pro

Painting an apartment is like going out to dinner — you can find a hot dog wagon, put down a few bucks and get it over with, or you can go to a nice restaurant and spend a bundle. It all depends on how much time, effort, and money you want to spend.

For most people, though, cheaper is better, and that means doing it yourself. Assuming your walls and ceilings are in basic good shape, here’s how to do it the right way, based on my ten years of professional paint contracting experience.

Gather the right supplies

Figuring out the type and amount of materials you’ll need for the job is often the most challenging aspect of painting. If you bring your wall and ceiling measurements to the store, they’ll hook you up with exactly what you need. Many will even deliver paint and supplies.

You want to choose the right type of paint — that means water-based latex flat paint for ceilings, flat or “eggshell” finish for walls, and eggshell or semi-gloss for sills and doors. Don’t be afraid to overbuy, as most stores allow returns of anything unopened, save for custom-mixed colors. Also, don’t buy cheap brushes; nothing’s more annoying than trying to move quickly but having to stop constantly and pick bristles out of your paint.

If you have water or mildew stains on your surfaces, buy a quick-drying alkyd or oil-based stain-killing primer, which can double as a primer for patched holes and cracks (and in this case, a cheap disposable brush or disposable mini-roller and handle is fine). If you’ve no stains, buy a water-based primer to seal up any repairs or patches after they dry.

Should I Paint Before Selling My House?

If you’re thinking about putting your house up for sale but it’s looking a little bit too ‘well-loved’, there are several ways to spruce it up. Tired, old homes can be given a makeover with a simple fresh coat of paint. This can not only make your property look more modern and appealing, but it can also potentially increase its property value. Both interior and exterior paint jobs can lead to great Returns On Investment (ROIs). A newly painted home will be worth more and it may also attract a higher number of buyers. So, should you paint your house before selling? Here are some painting tips to get you started.

Painting the Property’s Exterior

The importance of a good first impression on buyers cannot be emphasized enough. And the first impression that potential buyers have of your home is its exterior. It’s vital to make sure that the front of your home is as well-presented as possible. Badly maintained homes or those with a distasteful paint colours will be off-putting to buyers and may well cause them to offer a lower bid or simply look elsewhere. By painting the outer walls of your property, you can increase ‘curb appeal’ and make your home stand out from the neighbours’ houses. Neutral colours are generally recommended because they will appeal to a wider range of potential buyers. Although bold colours can be exciting, they may fall out of fashion or make your home stand out for all the wrong reasons. You can play around with colour by painting the trim a bolder shade, to make your property really pop.

Benefits of Painting the Interior

Making a good first impression with a tidy exterior is important, but the interior of your home should be given just as much attention. Peeling paint inside your home will signify to buyers that you haven’t taken good care of the property and that there may be other problems lurking below the surface. Wallpaper usually turns potential buyers off as well, because it often features busy patterns and makes the house seem outdated. We recommend choosing light, neutral colours for both the interior and the exterior of the home. This is because light colours can open up even a small space, making it appear brighter and larger.

Painting Tips

If you do decide that your property could benefit from a fresh coat of paint, be sure to take care of it before you take photos to advertise the property. For the cleanest, most efficient painting job, you may wish to hire a professional. They will have the equipment and experience to get the job done right. You could also decide to take on the painting yourself if you have the time and the inclination to do so – or even split the job half and half. For example, you could do the interior walls yourself to save money and then hire a professional to take care of the trickier areas such as the exterior and ceilings.

Before painting, you’ll want to smooth over any blemishes or cracks in the surface. Using putty or plaster will give you a good, clean finish. A quality primer can also provide you with a smooth area to work on. Although this may seem like a time-consuming step, primer can make a big difference in how professional and clean your finished walls appear. Primer allows you to apply a more even coat of paint, saving you time and money on additional coats

Questions to Ask Your Painter

If you want your home painted, you want it done right. Setting up expectations and details from the start ensures a smooth and successful painting project experience

Make a Plan

As with any home improvement venture, you’ll want to plan your project and research painting contractors before reaching out for estimates.

Think through the details

Certain information about the project needs to be determined before a painter can provide an accurate estimate:

Will this be an interior or exterior painting job, or both?

What parts of the house do you want painted? Just one wall, or every single room?

Do you want your crown molding and baseboards painted, too?

Do you want any wallpaper or ceiling texture removed?

Is there any damaged wood in these areas that would require carpentry work before the painting starts?

Compile a list of professional painters

Once you have an idea about your project’s scope, start making a list of contractors to contact. You’ll want to aim for at least three estimates, so pick about three to five companies to reach out to.

verify licenses and insurance, and we collect and publish homeowner reviews so that you can read through them and decide for yourself which company is right for you

Custom Carpet Flooring And Area Rugs

How do you kill germs in carpet?

Carpets can become a repository of allergens such as dust mites, which trigger allergic reactions. Bacteria, such as methicillin resistant staphylococcus aureus, or MRSA, can sometimes be found in your carpet as well. To address bacteria and allergens in carpets, pursue more than one cleaning method.

Step 1

Vacuum frequently with a vacuum with a HEPA filter to remove dust mites. If possible, invest in a carpet with short piles so vacuuming is more efficient at removing the dust mites near the bottom. Vacuuming also sucks up pet hair and dander, another common allergen found in carpet.

Step 2

Steam-clean the carpet using hot water and an appropriate detergent safe for use with your machine. Add 1/4 to 1/2 cup of vinegar to the solution to help kill the bacteria found in the carpet. Read the owner’s manual first before adding an additive, such as vinegar, to a carpet-cleaning machine.

Step 3

Lower the humidity in your home and maintain levels below 50 percent. Excess humidity can cause dampness in your carpet, creating a perfect breeding ground for bacteria and dust mites. Run a can use a dehumidifier, install a dehumidifier on your furnace or install vents in the most humid rooms in the home, such as the laundry room, kitchen and bathrooms.

Step 4

Spray a disinfectant safe for fabrics on the carpet to kill the bacteria. If you want to kill a specific bacterium, clean with a disinfectant registered with the Environmental Protection Agency as an effective disinfectant for that particular bacteria.

How to Disinfect Carpet

If you have a carpet mess that needs to be not only cleaned, but sanitized, white vinegar does the job. Eco-friendly and non-toxic, it’s a great solution for busy households in need of a quick fix. Best of all, it’s completely safe for both kids and pets, safe to pour down the drain, and inexpensive to use. It can kill 99% bacteria, as well as a majority of molds and viruses. Adding it to a steam cleaner will do the double-duty of also using heat to kill pathogens, leading to a well-cleaned area.

You Will Need:

  • Steam cleaner
  • White vinegar
  • Hot water

Steps to Disinfect the Carpet:

  • Mix a solution of vinegar and water. If no ratios are given for the machine, you can use one part vinegar to one part water. For severe cases, use full strength vinegar. If soap-to-water ratios are given, replace the portion of soap with vinegar.
  • Fill the detergent vessel of the steam cleaner with the solution. Do not overfill.
  • Run the steam cleaner over the carpets, following directions for the machine.
  • Allow the carpet to dry before use and traffic resumes. It works well to clean the carpets in the evening before going to bed so they can dry through the night. The vinegar smell will dissipate once the carpet dries.

Additional Tips and Advice

  • It is always best to spot test carpet with a new cleaner, such as vinegar. Allow the vinegar to sit in a hidden spot (closet?) for several minutes, then blot the area with a clean cloth while it’s still wet. If the color does not wash out or transfer to the cloth, wait an hour for the spot to dry and inspect the carpet again for damage. If none is visible, the carpet can be considered safe to clean with vinegar.
  • Wet carpets attract a great deal of dirt, so if it’s not possible to avoid walking on the carpet until it’s dry, lay some heavy duty towels down, especially in high traffic areas. Be sure to remove the towels when the room is not in use so the carpet will dry more quickly.
  • If the vinegar smell sticks around after the carpet has dried, sprinkle the carpet with baking soda and allow it to sit for several minutes to an hour before vacuuming it up. Make sure the carpet is completely dry before sprinkling the baking soda on it or it will react with the moist vinegar and you will end up with a gunky mess.
  • Steam mops also work well to disinfect carpet. Many come with a carpet attachment that will move across the carpet fibers. It will not clean it like a carpet steam cleaner, but the heat from the steam will kill any bacteria that may be present.
  • If you don’t like the smell of vinegar, look for commercial cleaners that will disinfect as they clean. They are available in the same areas where carpet steamers and vacuums are sold.
  • If none of the above options are possible, in a pinch you can use isopropyl alcohol, which will kill a majority of pathogens as well. It is a good idea to test this in a small hidden area first though as it can remove the dyes on some carpets. If needed, alcohol can be poured on the area to soak deep into the carpet padding as it will dry much faster than water. It is still a good idea to use dry towels to soak up as much moisture as possible (after allowing the alcohol to work for a few minutes), then put a fan on the area to aid in the drying time. Do not pour white vinegar onto the carpet. Also, do not use rubbing alcohol instead of isopropyl alchol as rubbing alcohol contains other ingredients, including dyes, which could stain the carpet.
  • Do not use a different type of vinegar, such as apple cider or wine vinegar. They are not as strong (i.e. not as effective) and they are not clear so they could leave a stain.

How to Kill Bacteria in Shag Area Rugs

Shag rugs have a certain retro charm reminiscent of the 1970s. They’re also soft, plush and comfortable to walk on, making them a perfect choice for covering cold hardwood or tile floors. However, because the fiber strands on a shag rug are extra long, they can be dirt and bacteria magnets. According to Brightnest.com, salmonella and E. coli thrive on pet dander and human skin cells, which we shed when walking across a rug barefoot. Disinfect your shag rug regularly to help prevent disease transmission.

  • Vacuum your dry rug at least twice a week with a wet/dry vacuum cleaner on the dry setting. Work back and forth, then up and down, vacuuming all surfaces of the rug from multiple angles.
  • Sprinkle your rug with baking soda before one of your vacuuming sessions each week, especially if you have pets. Allow the baking soda to remain on the rug for 10 minutes before dry-vacuuming to help eliminate dander.
  • Mix a solution of 1/4 cup vinegar and 3/4 cup water in a spray bottle. Spray the entire surface of the rug and allow the vinegar to do its work for 10 minutes. Vacuum the rug with a wet/dry vacuum on the wet setting.
  • Clean the back of your rug at least once a month. Turn the rug over, spray the back with the vinegar/water solution and vacuum it with the wet/dry vacuum. As an alternative for smaller rugs, take the rug outdoors, shake it out, spray the back and allow it to dry in the sun.
  • Hire a professional carpet-cleaning service to shampoo your shag rug at least twice a year. Not only can professional services offer a deeper cleaning, they can use disinfectant shampoos or steam cleaning to eliminate bacteria.

How to select the Right Vacuum Cleaner

When it comes to choosing the right vacuum for your carpet, you can’t just select from a leading vacuum brand and assume that it will be the best at removing dirt and dander. Just because a high-end model has superior suction power or functions as a robotic vacuum cleaner, that does not mean it will be most effective. Vacuum cleaners that are not adjustable to accommodate different carpet heights are not recommended.

Always look for a vacuum cleaner that is certified by the Carpet and Rug Institute (CRI) Seal of Approval/Green Label Vacuum Cleaner Program when purchasing a new model. If you like the current model you own, just make sure that it is a good match for your carpet to create the most effective airflow. Here are some key points to consider when selecting the right vacuum cleaner:

  • Vacuum Height – Adjustable height is the most important feature. A vacuum set too high above the carpet surface won’t get to the gritty soil and debris below. A vacuum’s beater bar or brushes can “fuzz” the carpet’s surface if the setting is too low. Your ideal height setting for airflow is based on pile height and fiber type. High pile and premium soft carpet require higher settings, while thick loop, casual frieze, or long pile carpet may require suction only. Use carpeting in your closets to perform test runs.
  • Suction Type – Extreme suction power does not ensure effective removal of dirt and debris and can even cause damage to the carpet. Avoid concentrated or sealed suction for high pile, premium soft carpet.
  • Beater Bar/Brushes – A vacuum with a rotating brush or beater bar should just lightly touch your carpet surface. This will prevent damage to your carpet and create better airflow based on your carpet’s specific pile height. With some wool loop berber carpets, we recommend disengaging the beater bar entirely.

How To Avoid Getting Burned With Kitchen Remodeling Mistakes

Things Not to Do While Remodeling Your Kitchen

I truly believe that kitchen is more than just a room for cooking/preparing food. It is actually the heart of every home. The evolution of kitchen design is directly linked to the choice of people that changes with time may be because of changing trends or the new technologies or designs prevailing in the market.

NO KITCHEN ISLAND

A kitchen island that you think represents the luxury of space is actually a magnet for all the messes. No matter how many times to try to clear out space, the result is always a mess. Not only just the mess, but it is also considered as impractical in kitchens with smaller areas, so just try to avoid this element to much extent.

SAY NO TO DARK COLORS

Try to avoid bright and flashy colors and instead use soft/light colors,  be it greys, browns, greens, purples, lemons etc. This is not only because soft colors lit your kitchen without using any electricity during the daytime at least but also soft colors have long-term value in terms of durability, cleaning and what not. So, try to use the colors which are pleasant to eyes for real.

NO DOUBLE LAYER KITCHEN STORAGE

Too much storage is too bad at times when it comes to additional drawers/dividers because practically they aren’t that useful as they seem and moreover they also invite more junk into the storages which results in a decrement of storage instead of increment. Moreover, they are not only expensive but you have to be too careful while using such complicated drawers, so it’s better to avoid them

DON’T MESS WITH KITCHEN WORK TRIANGLE

Not to forget the working of the kitchen behind putting all those colors and kitchen appliances on point. So, the major 3 elements i.e refrigerator, stove, the sink should be placed close to each other for the easy working in any kitchen

Things To Know Before A Kitchen Remodel

Are you thinking about a kitchen remodel this summer? You’re not alone! Many of the best homes for sale have newly updated kitchens, making this a great investment. When our brokers are helping potential buyers find their dream home, a great kitchen is almost always one of the most in-demand features.

Taking the time to create a solid plan and think through the details before you start your remodeling project can help you avoid any post-remodel regrets. Here are a few of the most important things you’ll want to consider.

Decide if You’re Loving or Listing

One of the first things you’ll want to do is think about whether you’re planning to stay in your home for the long term. If you’re remodeling in anticipation of selling, you’ll approach your project in a completely different way than you will if you’re designing your dream kitchen. If you’re planning to stay, it makes much more sense to splurge on the things that you’ve always wanted. Have you been dreaming of a built-in meat ager or a wine cooler? Go for it! However, if you’re remodeling to sell, these types of upgrades aren’t likely to bring you a great return on your investment.

Start with Your Budget

Starting a major project like this without a budget in place is a recipe for disaster. Chances are, you’ll end up spending way more than you anticipated or, even worse, you’ll run out of money before your remodel is complete. Don’t let this happen to you! Instead, plan out a detailed budget for each phase of your project. Don’t forget to add in the costs for appliances, materials, labor, and permits. It’s also a good idea to add an extra 10% cushion to cover any unexpected costs that come up.

Create a Realistic Timeline

It’s also critical to commit to a realistic timeline. The last thing you want is to get into a remodeling project that drags on for months longer than expected. Whether you’re hiring a contractor, planning a DIY project, or doing a combination of the two, it’s important to set your schedule and make sure you’re hitting milestones when you should. To help ensure you stick to the schedule, make sure you already have your materials and appliances before you start. You’ll also want to schedule electricians, plumbers, and any other subcontractors ahead of time. Otherwise, one small delay can sideline your entire project.

Choose Your Appliances Carefully

Picking out your new appliances is one of the most important (and most fun!) parts of a kitchen remodel. Make sure you don’t skimp here. You definitely don’t want to put effort into a remodel only to find that you’re disappointed with the results. On the other hand, don’t go too crazy. It’s so easy to get no-interest financing right now that you might be tempted to buy top-of-the-line everything. Splurge where it makes sense and choose simple, high-quality options for the rest.

Consider Your Cabinets

Quality kitchen cabinets are expensive, but it’s well worth the investment. In fact, putting cheap cabinets in your kitchen is one of the biggest mistakes you can make. When choosing your cabinets, make sure they’re trendy enough to give the remodel a modern look, but not so trendy that they’ll go out of style in just a few years.

Don’t Forget Lighting

The lighting you choose can make or break a kitchen remodel. Most older kitchens make do with a couple of ceiling lights and a small window over the sink. Now is the time to make a change! Consider replacing your windows with larger ones so you can take advantage of natural light. Also consider adding some interesting lighting options like pendant fixtures, under-cabinet LEDs, or even a chandelier. Make sure you add dimmer switches so that you can have plenty of light while you’re cooking and then set a more intimate mood for socializing.

Set Up a Temporary Kitchen

Living without a fully-functional kitchen is a hassle, especially if you have children. While it’s not ideal, you can create a temporary kitchen by putting your refrigerator and microwave in another room during the remodel. If the weather is warm enough, plan to grill outdoors or eat out.

Make Sure a Remodel is Really Right for You

Sometimes, it’s best to skip the remodel altogether. If you need major renovations to achieve the look you want, it’s often better to simply buy a new home that already has the features you’re looking for.

budget kitchen upgrades you can get done in a weekend

If you don’t already have plans, like a coveted dinner booking or catching up with friends, take it as a sign to tackle a low-cost kitchen upgrade. You might think that doing any kind of kitchen renovation is a task that’s not only expensive, but time consuming too.

There are some really simple tweaks you can make to your kitchen to give the space a refresh that won’t break the bank and can be done in a weekend. The best part is even beginner renovators can give some of these ideas a go at home.

Pick up a paint brush

When it comes to making a big impact on a budget, paint is your new best mate. There are so many parts of the kitchen you can change with a new lick of paint too. From the walls to your cabinets, pick which element needs a refresh and get to work.

Change your hardware

For a small investment and around an hour’s work, you can make a decent change to the look for your kitchen by changing the hardware. The handles on your cupboards and drawers can all be replaced, meaning you can change up the look of your kitchen with new hardware. Go for pops of brass or brushed gold hardware, paint your existing handles to give them a new life in a new colour.

Create a kitchen garden

A hit of green never hurt a kitchen in need of an update. The level of commitment here is totally personal — you could go for a full blown vertical garden wall. But if that seems like too much of a commitment, go for a herb garden on your window sill or even just a couple of little pots of your favourite herbs.

STEP CHECKLIST FOR AN ECO-FRIENDLY KITCHEN REMODEL

Nothing totally transforms the feel of a home like a freshly-updated kitchen. You can be “on trend” and still have a gorgeous efficient and healthy kitchen. When it comes to green remodeling, the kitchen may be the absolute perfect candidate – as anyone with remodeling experience knows, there are just about a million different ways to do it! After all, a kitchen remodel means updating cabinetry, faucets, walls, floors, countertops, appliances, you name it — the possibilities are seriously endless

FIND AN ECO-EXPERT CONTRACTOR

Working with a professional who already knows the green options you have to work with is always better than filling somebody in along the way and hoping for the best. You’ll save yourself both time and money by making sure you choose a contractor that speaks the language and knows all about the eco-friendly, non-toxic kitchen you’re looking for!

CHOOSE ECO-FRIENDLY MATERIALS

Countertops, flooring, backsplash — oh my! Choosing materials and bringing a color scheme together might be the funnest part about a kitchen remodel. But before you make your final material decisions, make sure you know their environmental impact. Plenty of sustainable materials, including countertops, FSC-certified cabinets, eco-friendly sinks and faucets, and recycled appliances are available to suit any space and any style. A beautiful kitchen is a lovely thing to see. But a beautiful and sustainably-sourced kitchen? Even better!

BUILD BETTER CABINETS

An eco-friendly kitchen simply wouldn’t be complete without non-toxic, sustainable cabinets. Most conventional cabinets, such as those made from plywood, pressed wood, particle board, and medium-density fiberboard, were assembled with glues that contain formaldehyde — a known carcinogen which off-gasses into your air long after the glue dries. Your eco-friendly kitchen deserves better! Choose cabinets built with safer materials like formaldehyde-free woods, solid wood, recycled wood, reclaimed wood, FSC-certified wood, bamboo, or even recycled concrete.

SELECT WATER-EFFICIENT FIXTURES

Did you know that simply choosing the right eco-friendly faucets can dramatically reduce the amount of water used in your home? Low-flow faucets, like those with the WaterSense label, conserve water without sacrificing the luxurious feel of high water pressure. WaterSense faucets use a maximum of 1.5 gallons per minute and can reduce a sink’s water flow by 30 percent or more, without sacrificing performance. In fact, we could save billions of gallons nationwide each year by retrofitting sink faucets with WaterSense eco-friendly faucets. Incredible

Things to Consider Before Remodeling Your Kitchen

The kitchen is the heart of the home. It is more than just a place for cooking meals and storing your food and appliances. Today, most people consider it as a space dedicated for fun family activities. Others even choose to entertain friends in the kitchen. A lot of homeowners dream of the day when they’ll finally be able to revamp their kitchen space. If you are thinking about redoing your kitchen, then we urge you to read on.

Make a plan

The kitchen is one of the most used rooms in the house. Take a look at your kitchen and think about what you want to do to make it more beautiful and functional. Think about traffic patterns. Work aisles should be at least 42 inches wide. Paths throughout the kitchen should be at least 36 inches wide. Also, think about where to store your pots, pans, plates, and other kitchen equipment. Everything should have its own place.

Set a budget

The kitchen is one of the most popular rooms to remodel, but it is also one of the most expensive to renovate. Depending on how serious an overhaul it is, the average kitchen renovation ranges between $20,000 to $50,000. The idea of giving your kitchen a makeover can be exciting, but it is a project that requires careful planning and budgeting. As you design your dream kitchen, you should also take a look at your financial picture and decide how much you are willing to spend for this project.

Consider your needs and lifestyle

Your kitchen should reflect your lifestyle. So before taking on a remodeling project, you need to take your family’s needs and lifestyle into consideration. Start by reflecting about how you actually use your kitchen. Is it mainly used for preparing meals? Or do you usually use it to entertain guests? Do your kids do their homework in the kitchen?

How long will it take?

The average kitchen renovation takes about 6 to 8 weeks. Generally, it depends on the complexity of the project, kitchen size, and scope. Before you start, ask your contractor for a timeframe. Sometimes, it takes longer than the agreed upon timeframe, so be prepared for that. If you are planning to do a major renovation, then you may need to stay someplace else while renovations are taking place. Imagine cooking and preparing meals in a messy home. I bet it’s going to cost you your sanity. Renting an apartment is a a good idea as it will lessen your stress. Plus, it will be easier for the contractors to do their job if no one is at home.

Creative Ways To Improve Packing Services

Packing Services

Moving to a new neighborhood? Don’t let the looming work of packing dim your excitement. You have packing services to rely on, after all.

Efficient and Reliable Packing Services

Packing and preparing for a move is a lot of work. You’re basically packing several years of your life in boxes. It’s not just a matter of putting in things wherever they fit, too; you also have to think about using the right materials and learn the proper methods of packing so that your furniture, appliances, gadgets, clothes, and other household belongings arrive at your new house in the same condition as before the move.

Moving and Storage has the expertise and resources to deliver superior packing and moving solutions.

Durable and appropriate packing supplies – We use a variety of packing materials, like corrugated cardboard boxes, holding trays, packing paper, bubble wrap sheets, blankets, packing foam, and specially-designed sleeves for tableware, glasses, bottles, and other breakables.

Careful handling–Rest easy because experienced packers take great care in packing household items, whether they’re low-maintenance like hand towels or fragile like a china lamp or a giant, flatscreen TV.

Efficient packing–Watch as your household gets tidied up and packed in a fraction of the time and effort it would take if you were to do the task on your own. attentive yet efficient packers who can put away small appliances and cooking tools in minutes.

Minimum disruption to your time – Be ready to move into your new home soon after team arrives to pack your stuff. If it will take more than a few days to get your things in order, discuss it with you so can agree on a schedule that works best.

Insured service –Ensure your belongings are protected, literally and figuratively. pull out all the stops to make sure all your possessions are packed well and delivered safely, but for your peace of mind

Organized and Systematic Packing Methods

pack by room and group items according to size, type, or storage location. Once have everything in boxes, label them accordingly. During move-in day, transport team will know which boxes may be piled and which ones need careful handling. also keep in mind the first-in, first-out principle when packing your belongings in large moving boxes.

Moving and Storage doing your packing, you’ll have more time to do pre-move errands, set things up at your new house, and say goodbye to your neighbors and friends.

A Complete Packing and Moving Service – Built to fit in with your busy schedule

fit in with you. Before moving day, packing services team will bring your packing materials and pack whenever suits you. You don’t even need to be there. Your Move Manager can take a note of any special instructions and make sure everything is done exactly the way you want.

Is it worth getting a full packing service?

often asked whether it’s worth using a packing company when moving. This depends on how much time you have spare and if you would prefer to leave it a dedicated team of professional and reliable movers and packers who can take away all the stress involved.

expert packers and packing team pack each item with obsessive care. There isn’t much haven’t packed before and team make it look very easy. only used the best packing materials and everything is colour-coded to make sure it ends up in the right place

Often clients go out for lunch and when they return they can’t believe everything is packed and loaded. completely understand if you would rather pack yourself and can still provide you with all the removals boxes you will need. However, clients who use packing and moving services often tell they will never pack themselves again! It really does take away all the stress of moving.

The Ultimate Moving Checklist

Your wrist may be sore from signing two inches of mortgage documents, but the real fun begins now! You need to transfer your family’s medical records, host a garage sale, discontinue the utilities — oh, and pack up all your earthly possessions and get them from Point A to Point B. It is possible to get it all done without losing your cool: Follow our 8-week timeline to get from “We’re moving!” to “We’re home!”

8 Weeks Before

Sort. Walk through every room and open every drawer; decide what to take to your new home and what to get rid of. Make a list of “keep” items that will require special packing or extra insurance coverage.

Purge. Donate items you no longer want, or host a yard sale.

Hire movers. Research moving companies. Always ask for the mover’s U.S. Department of Transportation license number; whether the company is bonded; and whether the company is licensed for interstate moves, if you’re moving out of state. Request in-home estimates to receive the most accurate pricing.

Contact your children’s school. Notify the school that you’re moving, and obtain copies of your children’s records. Contact new schools for enrollment and record-transfer procedures

6 Weeks Before

Make travel arrangements. Book hotel stays if you’ll need lodging on the road or before your new home’s ready; book any necessary flights.

Order packing supplies. Purchase standard boxes in various sizes; bubble wrap; packing paper; packing tape; and specialty containers, such as wardrobe and dish-pack boxes.

Contact your doctors. Obtain copies of medical records for all family members, or have the records sent to your new physicians. Haven’t found new ones yet? Ask your current doctors for recommendations.

Contact insurance agents. Find out whether your move necessitates changes in your medical, dental, vehicle or personal property insurance.

4 Weeks Before

Start packing. Begin with items you use only rarely or seasonally (e.g., fondue pot; pool toys); save items you use frequently (e.g., TV remote; your toothbrush) until just before moving day. Snap photos of valuables and pack them separately; you’ll carry those items with you.

Label, label, label. Mark each box with its contents and the room it’s destined for in the new house. The only exception: Don’t list contents on a box that contains valuables, to avoid theft.

Inventory. Keep a running list of each packed box, its contents and what room it belongs in. Later, you can match this against your moving company’s inventory sheet.

Measure. Ensure that all of your belongings can make it out of your old home and into your new one; measure any tall, wide or oddly shaped items, as well as any doorways or tight spaces they’ll need to fit through, so there are no surprises on moving day.

Update your computer. Download any necessary software updates and ensure that all of your files and photos are backed up to an online cloud storage service or an external hard drive that you’ll carry with you.

Make arrangements for pets. Book a pet sitter or care facility for moving day. If you’re moving out of town, make travel plans for your furry friends and ensure your veterinarian has authorized your pets for the journey.

Contact utility companies. Instruct existing utilities to disconnect services the day after your move; direct new utilities to install services at least a day before you arrive.

Consider storage. If your new home won’t be ready when you leave your old one, research storage options in your new community.

Clear the freezer. Start using up frozen food items that will be a hassle to move. Then, tackle the pantry and fridge.

Visit an auto mechanic. Get an oil change, tire fixes and any necessary tune-ups to ensure that your car survives the move.

Change your address. Visit USPS.gov or your local post office to officially change your address. Leave your forwarding address with a neighbor, just in case.

Alert important parties. Notify your employer, banks, credit card companies, subscription services, friends and family of your move.

2 Weeks Before

Confirm the movers. Contact the moving company and double-check your plans. Make sure the insurance in place is enough to cover your valuables.

Clear out. Empty out storage units, safe deposit boxes and any other off-site storage spots. And don’t forget to pick up your dry cleaning.

Take time off. Evaluate how many work days you’ll need to make the move, and then request time off from your employer.

Clean the rugs. Have area rugs cleaned; they’ll arrive rolled and wrapped from the cleaner, ready to unroll at the new house.

Pay it forward. As you pack, gather warranty information, manuals and other house-specific information in a binder for the new owners.

1 Week Before

Finish packing. Aim to complete the general household packing a couple of days before moving day.

Pack your bag. Your last bag should contain at least one change of clothes — or more, if you’re moving out of state — for each person in the family, as well as all of the basics (e.g., phone charger, toilet paper) you need to survive for a few days without the items on the moving truck.

Visit the pharmacy. Refill any prescriptions you’ll need for the next month, and arrange to transfer prescriptions to a pharmacy in your new community.

Unplug. Disconnect and clean any large appliances (e.g., washing machine, fitness equipment) you’re moving; contact a professional to disconnect gas lines. If you’re moving your fridge, defrost the freezer and clean it at least a day before you move.

Make your last donation. Arrange for a final pickup of all remaining items in your “donate” pile.

A Few Days Before

Confirm the movers … again. Triple-check arrangements with the moving company. Verify how much you’ll owe on moving day, and what forms of payment are accepted. Ask for a cellphone number for the day-of contact, and confirm the crew’s arrival time. Prepare written directions to your new home and hand them to the movers on moving day.

Get the keys. Arrange to receive the keys to your new home, or schedule the realtor or landlord to meet you on moving day.

Donate food. If you’d rather move fewer boxes, donate nonperishables to a local food pantry.

Disassemble furniture. Place screws, brackets and fasteners in a small plastic storage bag, and label it. Even better: Tape the bag to the furniture’s underside.

Get rid of it. Most movers prohibit moving boxes that contain paint, aerosol cans, matches, alcohol and other chemicals. Properly dispose of these items, or plan to move them yourself.

Packing Services

The physical packing of your items in crates or boxes to be moved is quite an intimidating task. Also, determining the best way to pack and unpack your items is a task that requires a lot of attention and time. This is where come in. Apart from moving and storage, Moving and Storage Company also offers packing services. are devoted to making the moving process as efficient as possible for customers. provide a wide variety of packing services, available for local, long-distance, and even cross country moves. team of professional packers is highly skilled in packing the delicate of items, so you know your belongings will genuinely be protected throughout the entire moving process.

SINGLE-ITEM PACK

If you`re done with most of the packing but don`t know what to do with the awkwardly shaped or sized items, then let professionals handle them for you.

KITCHEN PACK

It`s quite a task to pack all your pans, dishes, and pots in boxes, but you can always count on staff to pack all kitchen-related items for you.

FULL PACK

With this pack, you will not have to participate in a single part of the packing process. team will do all the work. You can get comfortable as you look forward to a good moving day.

Why Packing is Important

Packing is the initial step of your moving process. If you want to move your business or home, you need to pack all your items, and preparation is not a walk in the park. It has to be done with precision so that all items will be safe during moving.

Professional packing will guarantee the risk-free transportation of your belongings.

Be it domestic or commercial items that you need packed and moved, leave them to the experts!

Experienced and quick packers

Flexible slots for packing and removals

Sturdy boxes and packing materials can be delivered

Fully insured packing service

No removal job can be performed without packing all items first. It is of grave importance to pack your belongings in a safe manner and sturdy boxes with enough padding.

Been witnesses to many property damages resulting from improper packing. That’s why recommend booking a packing service before your moving day and leaving the packers to do the job.

One of the main benefits of doing this is that this way your items will be insured. cannot be held responsible for your items if you’ve packed them poorly. A team can arrive ahead of your moving day, and upon your request, they can even deliver the packing boxes and materials, do the packing the right way, and come back for your moving day.

Box delivery and packing are a vital and valuable part of any removal service – the movers and packers have got their techniques down to a fine art. save you a lot of time and hustle by packing your belongings, and can even supply the boxes!

Ways To Get Better Wedding Photographer Without Spending More

How do I start a wedding photography portfolio?

How do you build your portfolio when you don’t have any clients?  This is one of the most common questions I get asked, and it’s a legitimate one. If you want to make money with your photography, you don’t need a résumé, but you do need a good portfolio. Here are some tips about how to do that without clients

Photographing Children.

This is the genre in which you will get the models you need for free – use your own children (but they may be your toughest subjects!), your nieces and nephews or your friends’ children.  Does free models mean you photograph them for free? Well, yes, for a while. Just think of it as an investment into your future success.  Practice! Practice! Practice!  You get the opportunity to practice and show your skills (plus your patience) on a variety of subjects.  You get some amazing images to feature on your website.  And your friends get some really cool pictures of their kids. It’s a win-win situation.

Photographing High School Seniors.

Most of the above tips and benefits apply for shooting senior portraits. They don’t even have to be seniors – any high school or college youth can model for you and no one will know the differences.  Before you go out and shoot, though, look at other successful senior portrait photographers for inspiration, but, as always, let your own style shine.

Photographing Weddings.

I don’t recommend you shoot a friend’s wedding if you’ve never done such an event before. You would not want your friend to be left with poorly composed or badly lit wedding pictures. It is risky. If your friend wants you do give it a try, make sure you make it clear that this is your first try and that you cannot guarantee that the photos will meet their expectations. Instead of shooting the entire wedding, you could shoot your own images during the event without getting in the way of the main photographer. Try to capture some detail shots of the flowers and the cake at the reception for example. It will be good practice and no one will get hurt.

Assist a local wedding photographer. This will get you some hands-on experience at the side of a professional  Should you go that route, be aware that some wedding photographers may let you use some of your own images for your portfolio if you work as a second shooter, but many will not. It’s important to read your contract carefully before starting.

Ask a recently married friend if you can photograph her all made up in her wedding dress. Go to a really great location and pretend it’s the big day. Set up some indoor and outdoor shots in a variety of lighting and poses. You really only need a handful of well composed and well lit pictures of the bride to complement your portfolio. Get those detail shots and tell a story.

Wedding still life detail photos

Get some props and shoot still life photography. Take detail shots of engagement and wedding bands of friends and family members. Weddings are full of opportunities for still life photography. The table settings, flowers, jewelry and more are all beautifully laid out for still life photography. Get used to the little details that are just as important in a wedding day as the ceremony and reception.

Flatlay photography for weddings

Who doesn’t love a good flatlay? Flatlay photos are overhead still life photography shots that are really trendy on social media. Try your hand at flatlays with shoes, rings, jewelry boxes and more to take some gorgeous shots you can use in your wedding portfolio. There are styling boards for photographers that are specifically designed to help with these kind of shots as well. You can also make your own styling boards with fabrics and thick boards.

Wedding photography styled shoots

If you’ve ever put together a photo shoot before, styled shoots will be a breeze. Get together with some local artists and vendors to put together styled photo shoots for magazine submissions and portfolio building. Wedding photographers can submit real weddings and styled shoots through Two Bright Lights. It’s a great platform to get styled shoots published and build up your list of credits. The more credits you have, the more eyes you have on your work. Plus, how cool would it be for your future brides to get their work submitted to a magazine? Showing that you’ve been published before can give engaged couples an extra incentive to book with you.

Married friends

Have some married friends work with you on building out your wedding photography portfolio book. Get them to pull out their old wedding outfits for a day and take a walk around some of your prettiest local spots. Take them back to the spot they got engaged, or even married, and make the shoot special for them. Practice doing couples poses, engagement photos, and more with any married friends that you might have who feel comfortable in front of the camera.

Local vendors

Connect with local wedding vendors and offer to shoot some pro bono work for them. You’ll want to make lots of connections with wedding vendors if you plan to be one yourself! Shooting some work for them to feature on their social media or website will get your name out there to their audience of brides and grooms. If you continue to establish the connection, they may even add you to their recommended photographer list.

Photographing Real Estate. 

Apply the same strategies. We all know either a real estate agent or a home seller. Ask them if you can practice shooting their property, they get some freebies and you get experience plus images for your portfolio. Again, it’s a win-win situation.

Photographing Food. 

You don’t need to be a great cook or a talented food stylist to practice these special skills.  Just shoot some nicely presented take out food or pastries from the local bakery. The added bonus is you get to eat it when you’re done shooting!

How to Start a Wedding Photography Business

Want to start a wedding photography business? If you love taking photos, starting a wedding photography business can be a great way to make some extra income on the side (and it could even turn into a full-time gig!). In this step-by-step guide, we will share how to start a wedding photography business.

To start your wedding photography business, you’ll need to know these 5 steps:

Step 1. Register your wedding photography business

Step 2. Buy the right wedding photography equipment

Step 3. Create a wedding photography website

Step 4. Build your wedding photography portfolio

Step 5. Market your wedding photography business

How To Find A Good Family Law Attorney

What should you look for when choosing a lawyer?

A lawyer is an advocate. She should fight on your behalf, using reasonable, ethical, and cost-effective means. You should have an open line of communication with your attorney. After all, there’s a reason why attorneys are also referred to as “counselors.” Great attorneys can be found in high rise office buildings, small firms, solo offices, and in online directories.

With a great attorney being defined in so many ways, what qualities should you look for?

Comfort

The first, and perhaps most important, quality is that you should feel comfortable in your counselor’s presence. A comfortable and open relationship will allow you to share relevant information to your case openly, honestly, and completely. After all, a lawyer can’t fully assist you without knowing all of the pertinent information.

Clear Fee Structure

Another absolutely important characteristic of a good attorney is a clear, honest, and appropriate fee structure. For one, you’ll want to make sure that the price of the attorney is worth the case. Smaller disputes generally don’t warrant hiring the most expensive counsel. In addition, you should ask your attorney if they bill by the hour or if a flat fee arrangement is an option. While some attorneys might advertise a very low flat fee, you’ll also want to inquire as to any additional fees. The advertised price might not include court filing fees, or even the cost of printing documents for your case.

The Record

Before you even meet with the attorney, you should search for his or her name on the Internet. Look for online reviews and other comments that may be online regarding the attorney’s services. You should also check with your state’s bar association website to see if any complaints, misconduct charges, or malpractice accusations have been filed against the attorney.

You should also ask the attorney about her experience. Is this her first time handling this type of legal matter? For smaller matters, that might be acceptable and could even save you money. For larger disputes, you might consider a more seasoned (and likely more expensive) attorney.

Communication and Availability

If this is more than a short-term dispute, such as a contentious divorce, you’ll need to stay in contact with this attorney regularly over a few months, if not years. What you want to avoid is the attorney that does not return phone calls or emails in a timely manner. Though your case may be routine for him, it is very important to you and should be treated as such.

One way to test the firm’s communication is to email them questions shortly after your initial visit. Withhold a few questions from the consultation and follow up via email. If it takes days to respond, the firm may just be too busy to handle your matter. On the other hand, if you are impressed with their response time and answers, you may have just found your attorney.

How to choose the right lawyer: points to consider when selecting an attorney

With 1.1 million lawyers licensed to practice law in the United States, how does a construction company faced with a legal problem decide which attorney is best suited to help the company resolve the problem?

Selecting the right attorney is a time-consuming, but important process. To get started, develop a list of potential candidates by talking to business advisors, people in your industry, other attorneys and other trusted sources. You can consult law firm websites, online resources, bar associations or other referral networks.

The next step is to cut the list of potential candidates down to a manageable short list of preferred candidates. Then, contact and interview each of the preferred candidates in person. An increasing number of companies are investing the time and resources to go through a formal Request for Proposal (RFP) process.

Regardless of whether your company follows a formal or an informal process, construction executives should consider the following ten items when deciding which attorney is best for your company’s legal needs.

Identify Your Legal Problem and Use a Specialist

The first step in the process of finding an attorney is to understand the problem or issue facing you. The law has many different specialties and sub-specialties, and before you can accurately determine the best attorney to represent you, you need to determine what kind of lawyer is best suited to address and resolve your problem. During this initial phase, consult your general corporate lawyer or another trusted business advisor such as your accountant.

Select a specialist to help you solve your problem. Lawyers today are as specialized as doctors. You would not ask your internist to perform open heart surgery. Likewise, you should not ask your general corporate lawyer to handle a wage and hour audit or an OSHA inspection. A specialist will know the latest developments and legal nuances applicable to your problem without charging you extra to be on the “cutting edge.” This up-to-the-minute knowledge is essential since it could be the marginal difference in winning or losing your case.

Make Sure the Attorney has the Right Experience

The appropriate level of experience is one of the most critical criteria in selecting a lawyer. You want a lawyer with a track record of success with your type of problem. Such a record of experience will increase the likelihood that the attorney can help to resolve your problem successfully.

Obviously, length of service, number of cases in a particular specialty and geographic area and prior results are important matters to consider in evaluating the attorney’s “experience.” Along with experience comes knowledge of the adversaries and personalities involved in a case cumulative wisdom and perspective to evaluate risks and develop winning strategies related to a particular problem and confidence to steer you through the twists and turns of the legal process.

Viewing the law firm’s website will also give you insight into the scope of the firm’s practice. Explore the website of each firm on your “short list” and Google the firm and individual attorneys. These steps will help you assess the depth and breadth of the firm’s practice.

Consider The Attorney’s Approach And Fit With Your Company

Attorneys have many different styles, personalities and approaches to representing clients. In addition to finding a “professional” attorney, you should match the attorney’s traits to your own style, personality and approach. Underestimating the importance of this subjective factor would be a grave mistake. In the final analysis, you have to find an attorney with whom you are comfortable and that you can trust to take care of matters that may impact your business.

Use an Attorney Familiar with Your Region

Whether you use a local or national specialist depends on the nature of the matter at issue. For example, real estate or workers’ compensation matters are almost always handled locally. On the other hand, matters of federal law, such as wage and hour or labor law can be handled best by national specialists. Transportation and technology make it possible to use a specialist from almost anywhere in the country.

Someone familiar with your region will have better knowledge of the local laws and procedures and the personalities of the local judicial or administrative authorities. Moreover, face-to-face communications are generally better than telephone conferences and e-mail, so it may be better to have the specialist located close enough to visit the site of the problem in short order.

I want to hire a lawyer, but I do not have much money. Where can I find low-cost legal help?

Several legal assistance programs offer inexpensive or free legal services to those in need. Look in the yellow pages under topics such as “legal clinics,” “legal aid,” or “legal advice,” or search online. Most legal aid programs have special guidelines for eligibility, often based on where you live, the size of your family, and your income. Some legal aid offices have their own staff lawyers, and others operate with volunteer lawyers. Note that people do not have a right to a free lawyer in civil legal matters.

I have been accused of a crime, and I cannot afford a lawyer. What can I do?

If you are accused of a crime, the U.S. Constitution guarantees you the right to be represented by a lawyer in any case in which you could be incarcerated for six months or more. State constitutions may guarantee your right to a lawyer for lesser crimes. If you cannot afford a lawyer, either the judge hearing the case will appoint a private lawyer to represent you free of charge or the government’s public defender will handle your case, also at no charge.

Besides court-appointed defenders, is there any other form of government assistance available?

Departments and agencies of both the state and federal governments often have staff lawyers who can help the general public in limited situations, without charge. Consider contacting the relevant federal agency if you have specific concerns, such as environmental protection problems or discrimination in employment or housing.

Your State’s Attorney General also may provide guidance to the public on state laws, without charge. Some states, for example, maintain consumer protection departments as a function of the Attorney General’s office. Similarly, through their law departments, counties, cities, and townships often have government lawyers who may provide the public with guidance about local laws. Some of these local offices also offer consumer protection assistance. To find such agencies, check the government listings in your phone book or using your favorite search engine on the Internet.

Choosing an Attorney: 4 Things to Consider

From qualifications and cost, to the area of law and location, there are several aspects to turn over in your mind before selecting the attorney that is best for you and your legal situation.

Here are 4 factors you should think about when searching for a lawyer:

1. Long or short term?

Before you begin looking online, or asking colleagues, friends, or family for referrals, you need to address your own needs first. Why do you need an attorney? Do you have a legal problem that you cannot solve on your own? If so, would a professional be able to help?

After you have identified you do need legal assistance, figure out whether you need a lawyer short term or long term. This will depend on the work you would like done. For instance, do you need an attorney to provide advice on a current legal situation? This may only require a short term hire or a consultation. Oppositely, if you are looking for someone to handle all your legal affairs indefinitely, then you may require a long term attorney who you can call on when you need them.

2. Area of law

Lawyers tend to specialize in certain areas of law, as it is a very large field of study, similar to medicine. Some cover real estate law, while others pursue business, family, intellectual property, immigration, employment, accident/injury, bankruptcy, criminal, or civil rights law.

Attorneys can also be open to a wide range of situations, in which case they are referred to as general practice attorneys. Smaller communities see more general practitioners because there is limited legal help in the area.

However, if your situation is specific to your business, then you may want to choose someone who has experience in corporate law. Alternatively, if you need help settling a loved one’s estate, an estate planning lawyer would be the best fit.

3. Are they highly regarded?

When you hire someone to perform a service or offer advice, you want to ensure that they know their stuff. You may need to ask for referrals from people who have worked with them before. You can also seek out referral services online who can pair you with a locally certified lawyer suited to your needs.

Personal recommendations or connections can also be valuable, such as friends or family who have worked with a specific attorney.

4. Location

Laws vary by state. This means you should look for someone in your area who is familiar with the region’s legal requirements.

If you happen to live in a rural area with limited resources, you can use other methods of contact, such as phone or email, to discuss smaller issues. With larger legal matters, or for long term counsel, it’s important to find someone close to you so that you can develop a trusted, face-to-face relationship.

Posted inLegal