Old House Painting: Tips for Painting an Older Home
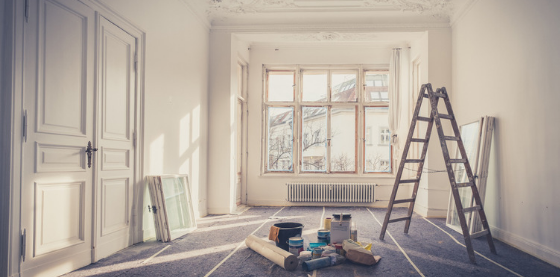
Older homes often have a charm or coziness that newer homes can’t replicate. Plus, they come with well-loved details like built-in shelving, original wood floors or quirky architectural details.
But every old home needs maintenance, updates or a refresh every few years or so. Paint is one of the best ways to give an old home new life while still retaining the integrity of the home. Painting an old home, however, is often accompanied by its own set of challenges which can range from small (tricky corners and trim) to large (replacing and repairing damaged walls or wood).
Whether you’ve just moved and are daunted by tackling paint projects that haven’t been touched in decades or have lived in your home for a while and need a color update, these next few tips will help make your older home painting project more manageable. Read on for best old house painting tips and ideas.
Know the Extent of Your Prep Work
You’re likely excited to pick a color and see your room come to life, but like all of our paint advice, we want you to always consider prep first. An older home usually requires a different approach to prep than a newer home.
Think through any areas that might need a deep clean or primed before painting. Ceiling painting in particular can be overlooked at this stage in the process. Older popcorn ceilings might need removed, smoothed, primed and painted. Or some ceilings may not have been cleaned in years, which means new paint may not adhere properly.
ESSENTIAL TOOLS AND EQUIPMENT YOU NEED FOR PAINTING
If you’re preparing for some painting and decorating jobs in the near future – as many people are at this time of year, homeowners and professionals alike – then your very first step will be to make sure that you’re properly prepared. There are few things worse than being midway through a painting job and suddenly realising you’re missing a vital piece of equipment, so to help you avoid that scenario, summed up all the absolutely essential painting and decorating tools and clothing you’ll need.
Tools and equipment:
Decorator’s overalls
Painter’s goggles
Dust masks
Gloves
Shoe covers
Detail:
PPE is a vital element of any job, and it’s no different when it comes to painting. You can never be too safe, and where your health or the health of those surrounding you is concerned, you should never take any risks. Equipment like goggles and dust masks protect the most sensitive areas of your face – dust masks especially can help prevent respiratory issues with inhalation. They may not be strictly necessary for every job, but we’d say it’s always better to be safe than sorry; if in doubt, we’d recommend wearing more PPE rather than less! Shoe covers might not always be quite as essential, but are they’re still useful if you need to protect furniture and carpets.
Tools and equipment:
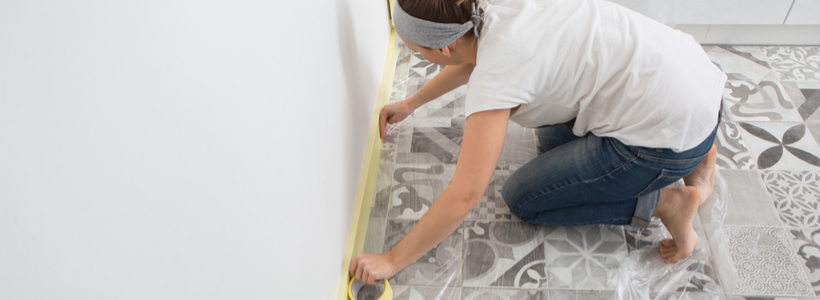
Dust sheet, canvas sheet or similar type of sheet
Painter’s tape or masking tape
Decorating cloths
Detail:
Before you can properly begin any sort of painting job, you’ll need to make sure you’ve got the right tools at hand to be able to protect the room and the furniture. Obviously, your first course of action will be to remove as much as you can out of there anyway, but dust sheets or canvas sheets are essential to protect whatever’s left. From there, you’ll want to shield any door jambs and light fittings with painter’s tape or masking tape, so that they don’t get caught by any stray paint. Decorating cloths, meanwhile, are suitable for wiping and polishing any surfaces that you’re going to paint ahead of time, so that your finish isn’t ruined from any dust or debris clinging to the surfaces underneath.

The Right Way to Paint Your Apartment, According to a Pro
Painting an apartment is like going out to dinner — you can find a hot dog wagon, put down a few bucks and get it over with, or you can go to a nice restaurant and spend a bundle. It all depends on how much time, effort, and money you want to spend.
For most people, though, cheaper is better, and that means doing it yourself. Assuming your walls and ceilings are in basic good shape, here’s how to do it the right way, based on my ten years of professional paint contracting experience.
Gather the right supplies
Figuring out the type and amount of materials you’ll need for the job is often the most challenging aspect of painting. If you bring your wall and ceiling measurements to the store, they’ll hook you up with exactly what you need. Many will even deliver paint and supplies.
You want to choose the right type of paint — that means water-based latex flat paint for ceilings, flat or “eggshell” finish for walls, and eggshell or semi-gloss for sills and doors. Don’t be afraid to overbuy, as most stores allow returns of anything unopened, save for custom-mixed colors. Also, don’t buy cheap brushes; nothing’s more annoying than trying to move quickly but having to stop constantly and pick bristles out of your paint.
If you have water or mildew stains on your surfaces, buy a quick-drying alkyd or oil-based stain-killing primer, which can double as a primer for patched holes and cracks (and in this case, a cheap disposable brush or disposable mini-roller and handle is fine). If you’ve no stains, buy a water-based primer to seal up any repairs or patches after they dry.
Should I Paint Before Selling My House?
If you’re thinking about putting your house up for sale but it’s looking a little bit too ‘well-loved’, there are several ways to spruce it up. Tired, old homes can be given a makeover with a simple fresh coat of paint. This can not only make your property look more modern and appealing, but it can also potentially increase its property value. Both interior and exterior paint jobs can lead to great Returns On Investment (ROIs). A newly painted home will be worth more and it may also attract a higher number of buyers. So, should you paint your house before selling? Here are some painting tips to get you started.
Painting the Property’s Exterior
The importance of a good first impression on buyers cannot be emphasized enough. And the first impression that potential buyers have of your home is its exterior. It’s vital to make sure that the front of your home is as well-presented as possible. Badly maintained homes or those with a distasteful paint colours will be off-putting to buyers and may well cause them to offer a lower bid or simply look elsewhere. By painting the outer walls of your property, you can increase ‘curb appeal’ and make your home stand out from the neighbours’ houses. Neutral colours are generally recommended because they will appeal to a wider range of potential buyers. Although bold colours can be exciting, they may fall out of fashion or make your home stand out for all the wrong reasons. You can play around with colour by painting the trim a bolder shade, to make your property really pop.
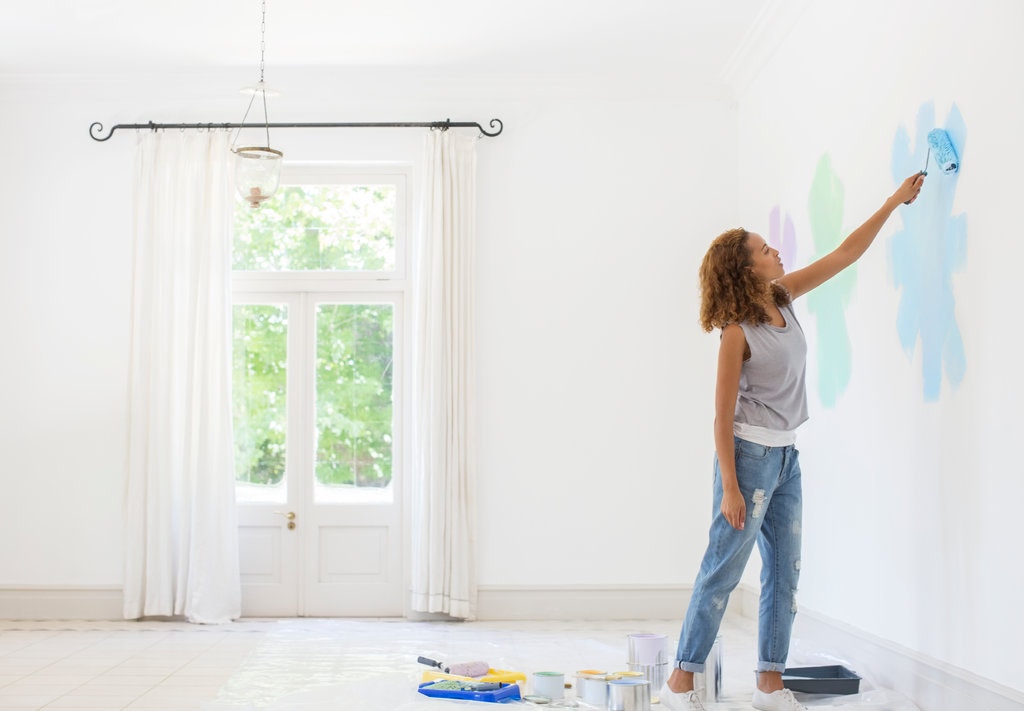
Benefits of Painting the Interior
Making a good first impression with a tidy exterior is important, but the interior of your home should be given just as much attention. Peeling paint inside your home will signify to buyers that you haven’t taken good care of the property and that there may be other problems lurking below the surface. Wallpaper usually turns potential buyers off as well, because it often features busy patterns and makes the house seem outdated. We recommend choosing light, neutral colours for both the interior and the exterior of the home. This is because light colours can open up even a small space, making it appear brighter and larger.
Painting Tips
If you do decide that your property could benefit from a fresh coat of paint, be sure to take care of it before you take photos to advertise the property. For the cleanest, most efficient painting job, you may wish to hire a professional. They will have the equipment and experience to get the job done right. You could also decide to take on the painting yourself if you have the time and the inclination to do so – or even split the job half and half. For example, you could do the interior walls yourself to save money and then hire a professional to take care of the trickier areas such as the exterior and ceilings.
Before painting, you’ll want to smooth over any blemishes or cracks in the surface. Using putty or plaster will give you a good, clean finish. A quality primer can also provide you with a smooth area to work on. Although this may seem like a time-consuming step, primer can make a big difference in how professional and clean your finished walls appear. Primer allows you to apply a more even coat of paint, saving you time and money on additional coats
Questions to Ask Your Painter
If you want your home painted, you want it done right. Setting up expectations and details from the start ensures a smooth and successful painting project experience
Make a Plan
As with any home improvement venture, you’ll want to plan your project and research painting contractors before reaching out for estimates.
Think through the details
Certain information about the project needs to be determined before a painter can provide an accurate estimate:
Will this be an interior or exterior painting job, or both?
What parts of the house do you want painted? Just one wall, or every single room?
Do you want your crown molding and baseboards painted, too?
Do you want any wallpaper or ceiling texture removed?
Is there any damaged wood in these areas that would require carpentry work before the painting starts?
Compile a list of professional painters
Once you have an idea about your project’s scope, start making a list of contractors to contact. You’ll want to aim for at least three estimates, so pick about three to five companies to reach out to.
verify licenses and insurance, and we collect and publish homeowner reviews so that you can read through them and decide for yourself which company is right for you